Showing posts with label health. Show all posts

Monday, December 8, 2014

Natural Remedies for Minor Ailments

Go Green in 2014: Week 49


I rarely take prescription or over-the-counter medicine, except for more serious ailments. For the most part, I prefer to let minor health issues resolve on their own...well, with a little help from "natural" home treatments.

Now, keeping in mind that I'm not a doctor and this is not meant to diagnose or treat your ailments, I would like to share a few things I have learned on my green journey. Since it would take a book to cover every minor ailment, I will just choose a few to cover in this post. If you would like to learn more, there are many resources that can help you treat a variety of symptoms naturally.

Here are a few ebooks that might be helpful.


Chest congestion

I once had so much chest congestion that I could hardly speak. I tried everything I could think of. Finally, one night, I boiled a pot of water and added a few drops of eucalyptus essential oil to the water. Draping a towel over my head, like a tent, I leaned over the pot of steaming water and breathed in the steam for about ten minutes. That night, I ran a humidifier while I slept, and the next morning, almost all the congestion cleared out. Now, whenever I even start feeling congested, I inhale steam daily until I feel better.

10 Natural Cold & Allergy Remedies

Minor cuts and scrapes

Melaleuca oil (tea tree essential oil) is a powerful healing agent for minor injuries. It is also a fast-working spot treatment for acne. I like to place a drop or two on a cotton swab and dab on the affected area a couple times a day until it's healed. I don't even own store-bought topical ointments anymore; I always use the Melaleuca oil or MelaGel (you can learn more at melaleuca.com). 

Dry or sore throat

At the first onset of a dry or sore throat, I start drinking chamomile tea with local honey (real honey; not the kind that comes in a bear-shaped bottle). Of course, I drink plenty of water, as well, and suck on hard candies or cough drops if needed. If you develop a cough, try swallowing a spoonful of honey before bedtime to soothe your throat.

Warning: Never feed honey to a child under one year old; it could trigger botulism (source).

Headaches

Headaches are tricky for me. Although effective, I don't like popping pills to get rid of them, so I will often let them get out of control before giving in and taking a Tylenol. However, if I catch it right away, I can occasionally get rid of a headache naturally. Sometimes, smelling peppermint essential oil can help. You could try diffusing it if you have a diffuser, or place a drop on your skin...just make sure you are using a high quality oil if you decide to use it topically. Reflexology can also help, as can a neck or shoulder massage if tension is the source of your headache.

What are some of your favorite natural, home remedies for minor ailments? Please share below if you have found an effective treatment for a problem that can be treated at home.

~ ~ ~

Disclosure: This post may contain some affiliate links, but all opinions are my own.

Your challenge: This week, consider using natural remedies or treatments for any minor ailments that may come up.
______________________________________________________

**This post is part of a weekly challenge {Go Green in 2014}, during which the author has challenged herself - and you - to find 52 ways to lead a greener life in 2014. You can follow the weekly posts on this page.**

Monday, September 29, 2014

Go Green by Driving Less

Go Green in 2014: Week 39

While cars create convenience and comfort, they also come with their own set of problems. Why aren't most cars today very "green"? Let's take a look at a few reasons we should try to reduce the amount of driving we do.

Electric Car

Reasons to cut back on driving

Why is it a good idea to drive as little as possible?

  • Gasoline emits pollution, which is bad news for us and for the environment. By reducing the amount of driving you do, you are also reducing air pollution, which could help slow down climate change and disease.
  • Gasoline costs money, and every time you drive somewhere, you are burning money - literally. By cutting back on your driving, you will have to spend less money on refilling the tank.
  • The less you drive, the less you have to spend on automobile maintenance. And if you don't have a car at all, you will have no maintenance fees whatsoever. Of course, it's not always feasible to completely do away with our cars, which may be our main method of transportation, whether we like it or not....

Ways to go green by driving less

Find an alternative to driving anytime you can, and you will not only save money on gas, but you will be taking a step toward saving the environment from a little more pollution.

  1. Walk whenever possible. Not only is it green, but this light form of exercise is healthier than you might realize.
  2. Ride your bike. Again, this is a healthy way to go green.
  3. Take public transportation. Multiple people riding in one vehicle is an efficient way to travel.
  4. Carpool when possible. Again, even riding in a car with one other person is beneficial to everyone.
  5. Telecommute. Can you do your work from home? You won't have to travel at all this way.
  6. Consider an electric car. They are starting to become more and more popular.

Skateboard, roller skate, ride an electric scooter...what are some more ways you can cut back on the amount of driving you do?

Photo courtesy of Flickr / Alan Trotter

~ ~ ~

Your challenge: This week, try to cut back on your driving whenever you can with one or more of the above ideas.
______________________________________________________

**This post is part of a weekly challenge {Go Green in 2014}, during which the author has challenged herself - and you - to find 52 ways to lead a greener life in 2014. You can follow the weekly posts on this page.**

Sunday, August 10, 2014

Green Ways to Get Rid of Allergens in the Home


Dust, pollen, and dander: There are numerous types of allergens that can invade a home. Those of us with indoor or outdoor allergies need to be proficient in getting rid of allergens in the home - and keeping them out as much as possible. Consider the following green tips for getting rid of allergens in the home (and avoiding those nasty allergy symptoms). 

Get rid of the houseplants
 
While houseplants are wonderful in purifying indoor air naturally - I love my houseplants! - they are also a source of allergens and can cause symptoms in people who have allergies. Get rid of the live plants and replace them with artificial ones. Just be sure to keep them dust-free if you are allergic to dust. 

Leave the windows closed during allergy season
 
As much as you love to let in the fresh air, you're going to be miserable if you have outdoor allergies. Keep the pollen and other allergens outside by keeping the windows closed during the peak of allergy season. Find other ways to avoid stale air, such as running the ventilation fan while cooking and freshen the air with an electric wax warmer and your favorite wax scents.

Keep pet hair to a minimum
 
If you are severely allergic to animals, it is not a good idea to allow them in the house. However, some people have mild allergies that can be minimized with several tricks. Firstly, bathe pets frequently and brush them daily to keep as much hair off the furniture as possible. Vacuum the floors and furniture as often as possible. If you are considering a future pet, choose a non-shedding breed, like my Maltese-Yorkie mix dog. While no pet is non-allergenic, certain breeds leave less allergens around the house. 

Vacuum carpets and furniture frequently
 
Even if you don't have pets, dust and other allergens will make their way into the house. They will settle into furniture and carpeting, which will build up if not removed frequently. Vacuum the floors and furniture at least twice a week to prevent the buildup of allergens. 


Shower before going to bed
 
If you spend any time outdoors, you will likely track in outdoor allergens on your clothing and in your hair. If you experience seasonal allergy symptoms, change your clothing upon entering the home and shower before going to bed, especially during allergy season. Doing so will help keep these allergens from getting onto your pillows and bedding while you sleep. 

Photo courtesy of Flickr / Jim Lukach

Thursday, August 7, 2014

Top 10 Reasons to Go Green with Home Cleaning Today

Why go green with home cleaning? I have found that there are a number of ways my family and I can benefit from cutting out the commercial cleaners and going green today. I feel much better about using alternative cleaning products in my home; these are just ten reasons to go green with home cleaning. 

1. You can save money. I haven't purchased cleaning products from the store since I started making my own at home. By using items I find in my own kitchen, which costs just pennies (or less) per use, I have saved a substantial amount of money. Many stores sell green cleaning products, but if you learn how to make your own, you can save a lot of money. 

(c) Tonya Mickelson 2014
2. Your health will benefit. Most commercial cleaning products, including laundry detergent, glass cleaner and bathroom cleaners, contain harmful ingredients that, when inhaled, can be toxic to your health. You might not even realize their impact until you stop using these products and go green with home cleaning. 

3. Your family will be healthier. Everyone in the house benefits from green cleaning: your spouse, the kids and even the family pets. The toxic chemicals have a much stronger impact on animals and small children than healthy adults. 

4. You can preserve the environment. Toxins from these cleaning products may directly or indirectly impact the environment. For example, when they are washed down the drain, these chemicals remain in the water that reaches local aquatic life, potentially killing them. 

5. Cleaning is much simpler. You won't need to buy a different product for each task; many household items can be used for cleaning multiple areas of the house. Vinegar, for example, is the main ingredient in almost all of my homemade products, from glass cleaner to floor cleaner. 

Click to learn more about green all-purpose sprays

6. You will save a trip to the store.
When you run out of your homemade all-purpose spray, there is no need to make a trip to the store. Instead, simply whip up a new batch using ingredients that can be found in the kitchen for mere pennies. 

7. Your immune system will benefit. By avoiding harsh cleaning agents, your body will be able to build up a natural defense system and, therefore, will be able to fight off the flu and common colds much more effectively. 

8. Indoor air quality will be improved. Every time they are used, chemicals from commercial cleaning products seep into the indoor air you breathe. By removing these products from the home and going green with home cleaning, you can breathe easier knowing that your home has cleaner air. 

9. They are just as effective. Too many people associate the strong chemical odor with a "clean" smell. Because green cleaners don't smell so strong, does that mean your house isn't getting clean? I've haven't yet had a problem with my homemade products getting the house clean. 

10. You will be a role model. When others, particularly the younger generation, see that you are cleaning your house with healthier products, they will be inclined to do the same. Today, you can teach them the benefits of using green products to clean the home.

Monday, August 4, 2014

Safe Sunscreen Options for All Year-Round

Go Green in 2014: Week 31


We are constantly told to wear sunscreen, yet how many of us actually wear it on a daily basis? I used to wear face moisturizer with sunscreen every day, but since I quit buying commercial products, I don't anymore. I don't spend a lot of time outdoors anyway, and I think a small amount of daily unprotected sun exposure can be a good thing. But what about those days when we spend a lot of time in the sun? I haven't bought sunscreen in a while because I have heard conflicting information about its benefits, including that it may promote skin cancer growth (source), and have decided that I would rather go without. However, that's actually not necessary. Did you know that you might already have a safer alternative in your home?

There are various products, which you might find in your kitchen, that can help filter the sun's rays.

Natural sunscreen options

  • Coconut oil, SPF 4-6
  • Shea butter, SPF 4-6
  • Almond oil, SPF 5
  • Carrot seed oil, SPF 35-40
  • Red raspberry seed oil, SPF 25-50

Any of these products could be applied directly to the skin as a daily moisturizer that will also protect against the sun. I haven't tried them all, so I'm not sure if there are any negative effects caused by using them. I do know that coconut oil leaves my face looking a bit greasy, but in small doses, it might work for you.

Some of these products have a higher SPF than others; however, they don't have to be used alone. They can also be combined into a custom sunscreen blend.

Homemade sunscreen recipe

Ingredients:

  • 3/4 cup lotion (non-toxic, preferably homemade)
  • .4 - 1.6 oz. uncoated, non-nano zinc oxide

Directions:

  1. Warm the lotion (using warm bath water) and mix it with the zinc in a food processor. The more zinc you use, the higher sun protection you will get.
  2. Store the sunscreen the same way you would store the lotion; certain oils may require it to be stored in the fridge.
  3. Apply before sun exposure. There is no need to wait before going outside because it will be effective immediately.
  4. Reapply sunscreen after swimming, since it is not waterproof.

Notes: You can add essential oils for fragrance and cocoa powder to tint the sunscreen; the zinc oxide can leave you looking a bit pasty.

~ ~ ~

**Disclosure: Although this post may contain affiliate links, all opinions are my own.

Your challenge: This week, think about trying one of the above natural sunscreen options.
______________________________________________________

**This post is part of a weekly challenge {Go Green in 2014}, during which the author has challenged herself - and you - to find 52 ways to lead a greener life in 2014. You can follow the weekly posts on this page.**

Monday, July 28, 2014

Simple Ideas for "Greening" Your Coffee and/or Tea Habit

Go Green in 2014: Week 30


Ahh! The aroma of freshly brewed coffee wafts through the house....

We enjoy drinking coffee and hot tea in our house, as many of you probably do. And like with many other aspects of life, there are various ways to "green" our coffee and/or tea habits.

First, you might want to consider where your hot beverages came from. Maybe you've never thought about it, but coffee and tea can be acquired from organically- and sustainably-grown sources. And hopefully it is fair trade. It's not always easy to find products that fit all these requirements; I won't claim that everything I buy has these certifications. Not even close...but every little bit helps.

Let's go over some of the reasons why it's a good idea to look for these certifying logos.

Why choose "organic" and "fair trade"
  • Organic farming relies on techniques like crop rotation, green manure, compost, and biological pest control, rather than harmful fertilizers and pesticides. Look for the USDA Organic seal on the packaging to be sure a product is actually organic.
  • Fair trade is a system of exchange that ensures farmers and workers are justly compensated for their products and services (source). Look for the fair trade logo on packaging to be sure a product is fair trade-certified.
  • Additionally, a product might be advertised as being "sustainably grown", which basically means it was produced without harming the eco-system. Sustainable agriculture reduces the risk of topsoil depletion and groundwater contamination, the decline of family farms, the continued neglect of the living and working conditions for farm laborers, the increasing costs of production, and the disintegration of economic and social conditions in rural communities (source).


Ideas for reducing coffee and tea waste

Another aspect of going green is trying to reduce waste every way we can. When it comes to our hot beverages, reducing the amount of wasted packaging is a huge step in the process of "going green". And believe it or not, we can actually reuse those old coffee grounds and tea leaves in various ways, as well.

Ways to eliminate packaging waste

  • Rather than using disposable cups at home, use washable mugs - and if you like to pick up coffee at the gas station, make sure to have a travel mug along so you can reduce waste (and maybe even get a discount on your coffee??).
  • Buy larger containers of coffee grounds and bigger boxes of tea to reduce packaging waste.
  • Instead of buying individual K-Cups (for Keurig brewers), get a reusable mesh filter (affiliate link) that you can fill with your own grounds and wash between uses.
  • Invest in a tea ball or loose leaf infuser (affiliate link) that can be used for straining tea leaves; this is a great way for tea enthusiasts to reduce packaging waste.
  • Look for products with biodegradable packaging, and add them to your compost pile.
  • Compost your coffee filters.
  • Recycle packaging where you can: plastic containers and coffee tins, plastic wrapping, and cardboard boxes.

Ways to reuse coffee grounds

  • Compost your used coffee grounds.
  • Reuse coffee grounds in homemade body products, such as body and facial scrubs.
  • Remove odors from your hands by rubbing used coffee grounds between them before washing with warm water and soap.
  • Keep pests out of your garden by sprinkling coffee grounds around problem areas. This also helps keep cats away from your plants.
  • Fertilize plants, inside and outside the house, by sprinkling used coffee grounds in the soil where they grow. It may seem strange, but plants love coffee!

Ways to reuse tea leaves

  • Compost your used tea leaves.
  • Soothe tired eyes with cooled tea bags; simply place them under the eyes for as long as it is enjoyable.
  • Use cooled tea bags as a cold compress for the relief of bug bites, burns, and bruises.
  • Or, use them as a hot compress to heal pinkeye, canker sores, and fever blisters. They can even help treat plantar warts by drawing out the infection.
  • Feed your plants with used tea leaves. Sprinkle them in the soil around houseplants or in your garden to help it grow.
  • Absorb odors in the fridge with used tea bags.
  • Soak in a bath of warm tea; run the bath water over several used tea bags and soak for at least twenty minutes to soften your skin.

Now that we've gone over a few simple ideas for "greening" your coffee and/or tea habit, which to you prefer: coffee or tea? What are some of your favorite ways to reduce waste or reuse old coffee grounds/tea leaves?

~ ~ ~

*Disclaimer: Although this post may contain affiliate links, all opinions are my own.

Your challenge: This week, think about the ways you can go green with your coffee and tea and consider giving them a try.
______________________________________________________

**This post is part of a weekly challenge {Go Green in 2014}, during which the author has challenged herself - and you - to find 52 ways to lead a greener life in 2014. You can follow the weekly posts on this page.**

Monday, May 26, 2014

Ways to Switch from Plastic to Glass Containers

Go Green in 2014: Week 21

*I thought I had this post scheduled to automatically publish while I was away for Memorial weekend, but apparently I didn't, so here it is...a little late.


Although a lot of plastic containers and water bottles are labeled "BPA-free", they may still contain other harmful chemicals to replace the BPA. These chemicals can leech into your food and beverages, which are then consumed. First of all...

What is BPA?

BPA is short for Bisphenol A, which is an industrial chemical found in polycarbonate plastics and epoxy resins. Even miniscule exposures increase risks for breast cancer, prostate cancer, infertility, early puberty, metabolic disorders and type-2 diabetes (source).

Some BPA alternatives, such as BPS, have come on the market, but have yet to be proven safe.

Ways to switch from plastic to glass containers

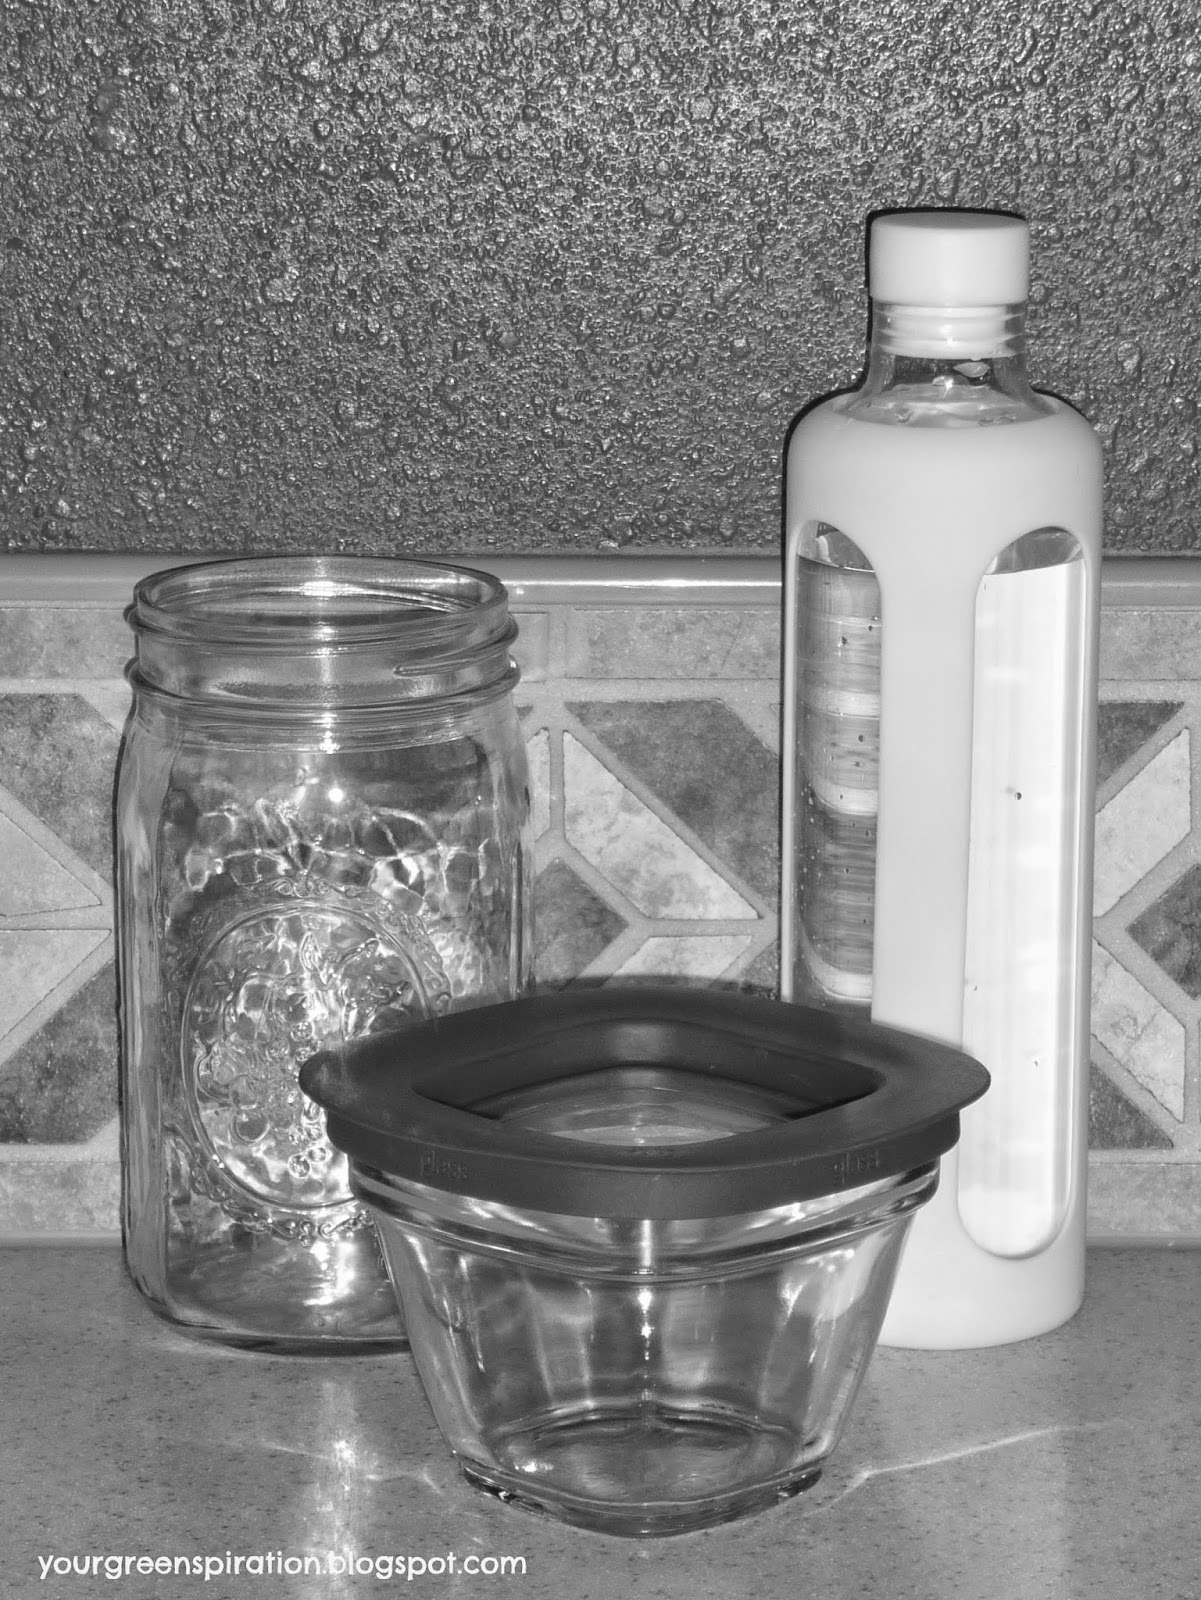
  • Drink from glass water bottles instead of disposable plastic ones. Not only are they healthier, but the water tastes more pure and you will reduce waste. If you can't find one in stores, you can order them online (the pictured bottle is not currently available, but this one has pretty good reviews).
  • Store food in glass containers instead of plastic. This is especially important when the food is hot, because it can heat up the plastic, releasing the dangerous chemicals into your food. Never microwave a plastic food storage container.
  • Use glass mason jars for storing food, drinks, and more. They work great if you make ice cream toppings, iced tea, or you could even a mason jar as a candy jar. Tied with a ribbon, they are a great way to present a "gift in a jar". And you can even turn mason jars into drinking glasses, soap pumps, and more (mason jars on Pinterest).

I'm going to cut it short this week, but before I sign off, I have to ask: What are some ways you have gotten rid of plastic in your house, particularly for food and beverage storage?


*Disclaimer: I bought all of these products with my own money, and have not received compensation of any kind to review them.


**Disclosure: Although this post may contain affiliate links, all opinions are my own.

Your challenge: This week, consider starting to switch out your plastic containers for glass.
______________________________________________________

**This post is part of a weekly challenge {Go Green in 2014}, during which the author has challenged herself - and you - to find 52 ways to lead a greener life in 2014. You can follow the weekly posts on this page.**

Monday, May 19, 2014

Oil Pulling and Natural Dental Health

Go Green in 2014: Week 20


We're twenty weeks in already... Twenty weeks into my green challenge, and twenty weeks into 2014. I can hardly believe it. Anyway, moving on to this week's challenge: oil pulling and other natural methods for cleaning our teeth.

You might have heard of oil pulling recently - it's been touted all over the web as the newest health 'trend' (although it's actually been around for thousands of years). Well, here's one more post on oil pulling because, after all, there aren't nearly enough out there already.

I've been oil pulling for over a year now. First, what exactly is it?

How to 'oil pull'

All you need to do is place a spoonful of a healthy oil (coconut, sunflower, sesame, olive, etc.) in your mouth and swish for twenty minutes. That's it. Easier said than done, though, right?

Some people have a problem with the taste and feeling of oil in their mouths. Some even gag on it at first. I use virgin coconut oil, which has a slight coconut flavor (sorry, it's not the one in the picture - I use refined for cooking since it doesn't have the coconut flavor), and it didn't take me long to get used to it, but it could be different for you.


Tips:

  1. Start out oil pulling for five minutes if you have a hard time getting used to the experience, then work your way up to twenty minutes - but no longer than that.
  2. Do it first thing in the morning, which is one of the times during the day when the bacteria count in your mouth is highest. If you do it twice a day, the second time could be right before going to bed at night to ensure an extra-clean mouth while you sleep.
  3. Do not swallow the oil; it will collect lots of bacteria in your mouth that you probably don't want going through your digestive system. Remember, the reason you're oil pulling in the first place is to remove these yuckies from your mouth.
  4. Spit the oil into the trash can, not the sink or toilet. It could potentially clog your plumbing. 
  5. Rinse your mouth well after oil pulling. I always oil pull first thing in the morning while getting ready for work, then brush my teeth after eating breakfast - but this is just what works best for me.

Benefits of Oil Pulling

  • Pulls disease-causing bacteria from around the teeth and gums
  • Whitens teeth
  • Reduces sensitivity
  • Reduces bad breath
  • Could prevent/reduce periodontal disease
  • Helps with acne, eczema, and dermatitis
  • Reduces allergies and asthma
  • Removes mucous and relieves congestion
  • Relieves PMS
  • And more...

Does oil pulling actually work?

You are probably wondering if it actually works, or if it's way over-hyped. I won't claim that it's a miracle cure, because I haven't noticed any huge changes in my health. However, I do believe (and research backs this up) that oral health correlates with our overall systemic health. When our mouths are healthy, our bodies are freed up to work on healing other health problems.

Benefits I've noticed since I started oil pulling: cleaner feeling in my mouth, better breath, whiter teeth, and reduced sensitivity. As long as I have been oil pulling, I haven't gotten a cold or allergies (but I did last fall when I took a break from it). And for the most part, I don't seem to get menstrual cramps as strong I have in the past, although that could just be a coincidence. As an experiment this past week, I stopped oil pulling for a few days, and I did notice that my mouth didn't feel nearly as clean, my teeth felt a lot more sensitive, and I'm pretty sure I had worse morning breath!

More natural dental health tips

I use oil pulling as a replacement for mouthwash, but it should not be used as a replacement for brushing your teeth. If you like, you could also make a mouthwash using essential oils (make sure they are safe to use orally) or with Dr. Bronner's peppermint soap. To brush, I look for whatever natural toothpaste I can find in the organic section at the grocery store, although there are lots of recipes for homemade toothpaste. Some people brush with baking soda, which is a natural teeth whitener, although I feel that it's too harsh as a long-term solution. For whitening, I have heard of people who use activated charcoal, although I haven't used it personally.


Should you try oil pulling?

Sure, twenty minutes is a long time. But you can easily do your daily oil pulling while showering, reading, watching TV, cleaning, during your morning primping routine...and so on. However, make sure to read the disclaimer below before starting your oil pulling routine.

*Disclaimer: I am not a dental or medical professional, and this is not intended to replace professional advice or regular dentist visits. You should never use oil pulling as a replacement for medical treatment. If you are pregnant or have a medical condition, see your doctor and ask if it is safe for you to try oil pulling.

~ ~ ~

**Disclosure: Although this post may contain affiliate links, all opinions are my own.

Your challenge: This week, consider trying oil pulling, at least for a few minutes to get started. Once you have gotten used to it, try working your way up to twenty minutes.
______________________________________________________

**This post is part of a weekly challenge {Go Green in 2014}, during which the author has challenged herself - and you - to find 52 ways to lead a greener life in 2014. You can follow the weekly posts on this page.**

Monday, May 5, 2014

10 Natural Cold & Allergy Remedies

Go Green in 2014: Week 18

Jim Lukach / https://www.flickr.com/photos/65047661@N00/
Allergy season is in full force, and excluding the occasional dry throat, I have been able to avoid it so far. If you are suffering from a cold or seasonal allergies, you might be wondering how you can naturally relieve the symptoms or - if they haven't gotten to you yet - avoid them altogether. The following tips don't guarantee perfect results, but they can certainly help.

Is it a cold or allergies? Find out here.

Dietary changes

1. Eating nutritional, organic foods can potentially ward off colds and allergies. This is something you can do all year-round to help ward off sickness, and to lessen symptoms when you are unable to avoid them.

2. Avoid fruit (especially the peels) when allergy symptoms are in full force. While fruit can help keep you healthy, the pollen on many fruits can exacerbate symptoms if you are already experiencing them. If nothing else, remove the peel before eating it.

3. Consider incorporating probiotics into your diet to ensure a healthy gut. Probiotics help keep your digestive system healthy by repopulating your gut with good bacteria. You can take them either in pill form or by consuming fermented foods, such as yogurt.

Oral remedies

4. Local honey is believed to help prevent seasonal allergies, and it can relieve symptoms. It is believed that consuming honey from local bees can help acclimate you to the pollen in your area, which lessens allergy symptoms. Whether this is true or not, I do know that honey is a wonderful natural remedy for a sore throat, among other cold and allergy symptoms.

Y.S. Organic Bee Farms - Organic Honey

5.  Apple cider vinegar can help reduce mucous production and relieve symptoms. It may not taste the best, but if you can choke down a couple teaspoons a day, you might find yourself feeling much better within a couple days.

6. Nettle leaf is a natural antihistamine and can help soothe allergy symptoms. Nettle leaf is often consumed in tea form.

7. Quercetin is a natural bioflavonoid that is believed to help stabilize mast cells. This keeps them from releasing histamine, thus relieving allergy symptoms.

Relieving congestion

8.  Oil pulling is an ancient practice that has recently been discovered by many. It involves swishing oil (such as olive or coconut) in the mouth for twenty minutes, and has many benefits, including loosening mucous. If done daily, it could even help with avoiding colds and allergy symptoms.

Nutiva Organic Virgin Coconut Oil

9. The neti pot is recommended by traditional and natural doctors alike. I have not needed to try it, but I have heard good things about this method. To use the neti pot, you pour a solution through the spout into one nostril and let it flow out the other; this process cleans out the sinuses. You can either buy the solution or make your own at home.

10. To relieve chest congestion, boil a pot of water and breathe in the steam for 10-15 minutes. Make sure to cover your head with a towel to trap the steam. I have had wonderful results with this natural remedy, especially when I added a few drops of eucalyptus essential oil to the hot water. It will loosen up the congestion and help to clear your lungs.

~ ~ ~

**Disclosure: Although this post may contain affiliate links, all opinions are my own.

Your challenge: This week, if you experience seasonal allergies, consider the ways you can relieve them naturally and incorporate these ideas into your daily routine.
______________________________________________________

**This post is part of a weekly challenge {Go Green in 2014}, during which the author has challenged herself - and you - to find 52 ways to lead a greener life in 2014. You can follow the weekly posts on this page.**
Related Posts Plugin for WordPress, Blogger...